Ok so imagine the year is 1973. All the talk is about a new arcade game which has been released by Atari. That game is called Pong.
Now it might not seem much of a game by today's standards, but it was a massive hit in its day... or so I am told.
But don't be deceived, although a simple game, Pong covers a wide range of aspects of computer game programming. There is movement, control, collision detection, scoring, artificial intelligence. Its all in there!
Being able to program Pong is a doorway to being able to program a lot of other games.
However once you start playing Pong you might find less time to program, as it is quite addictive!
We are going to program pong using Python and Pygame.
I will be using Python 2.7. For those programming on a Raspberry Pi this will already be installed. Just ensure you click on the IDLE icon and not the IDLE3 icon. If Python 2.7 is not installed on your system you may have to install it from the Python website, just follow the link below.
Pygame is a basically a set of modules which are designed to help you write computer games. We will be using some of these modules throughout this tutorial. You will need to install Pygame, which is free, and runs on Windows, Linux and Mac OSX (plus many more operating systems!)
If you are programming on a Raspberry Pi, again this is already installed, if not to download Pygame go to the Pygame website.
One final comment before we get into the programming, on the Raspberry Pi desktop there is a Python Games icon. This links you to a website by Al Sweigart who has written several Python books including one on Pygame. If you are new to Python then check out his books.
I cannot rate them highly enough! After several false starts with other books, it was these resources that taught me Python.
Ok that's enough pre-amble, lets get on with it.
I am going to break this game down into stages, which reflect how I developed it. I hope this will show you that when you look at the game as a whole it can seem daunting, but when broken down it is just made up of many easy parts.
So the stages we will follow are:
Stage 1 - Create a blank screen
Stage 2 - Draw the arena, the paddles and the ball
Stage 3 - Move the ball around
Stage 4 - Check for a collision with all edges
Stage 5 - Move the players paddle
Stage 6 - Move the computers paddle with Artificial Intelligence
Stage 7 - Check for a collision with the paddles
Stage 8 - Add a scoring system
Stage 9 - Finally we will look at methods to increase the speed for slower computers
As we go through this tutorial I will provide the whole of the code at the beginning. To help you isolate each stage I will also provide the complete code for that stage as we get to it. I will also tell you where to type each line and include the code you need to type. Where I feel it necessary I will add additional lines in with the code to help you understand where you should type the code. You can always refer to the source code of the complete program or the source code of that stage for further guidance.
First of all, as promised, I will show you the whole code. At this stage don't worry if you don't understand it all. I would suggest having a read through it and seeing what parts you understand and which you don't.
import pygame, sys
from pygame.locals import *

# Number of frames per second
# Change this value to speed up or slow down your game
FPS = 200

#Global Variables to be used through our program

WINDOWWIDTH = 400
WINDOWHEIGHT = 300
LINETHICKNESS = 10
PADDLESIZE = 50
PADDLEOFFSET = 20

# Set up the colours
BLACK     = (0  ,0  ,0  )
WHITE     = (255,255,255)

#Draws the arena the game will be played in.
def drawArena():
    DISPLAYSURF.fill((0,0,0))
    #Draw outline of arena
    pygame.draw.rect(DISPLAYSURF, WHITE, ((0,0),(WINDOWWIDTH,WINDOWHEIGHT)), LINETHICKNESS*2)
    #Draw centre line
    pygame.draw.line(DISPLAYSURF, WHITE, ((WINDOWWIDTH/2),0),((WINDOWWIDTH/2),WINDOWHEIGHT), (LINETHICKNESS/4))


#Draws the paddle
def drawPaddle(paddle):
    #Stops paddle moving too low
    if paddle.bottom > WINDOWHEIGHT - LINETHICKNESS:
        paddle.bottom = WINDOWHEIGHT - LINETHICKNESS
    #Stops paddle moving too high
    elif paddle.top < LINETHICKNESS:
        paddle.top = LINETHICKNESS
    #Draws paddle
    pygame.draw.rect(DISPLAYSURF, WHITE, paddle)


#draws the ball
def drawBall(ball):
    pygame.draw.rect(DISPLAYSURF, WHITE, ball)

#moves the ball returns new position
def moveBall(ball, ballDirX, ballDirY):
    ball.x += ballDirX
    ball.y += ballDirY
    return ball

#Checks for a collision with a wall, and 'bounces' ball off it.
#Returns new direction
def checkEdgeCollision(ball, ballDirX, ballDirY):
    if ball.top == (LINETHICKNESS) or ball.bottom == (WINDOWHEIGHT - LINETHICKNESS):
        ballDirY = ballDirY * -1
    if ball.left == (LINETHICKNESS) or ball.right == (WINDOWWIDTH - LINETHICKNESS):
        ballDirX = ballDirX * -1
    return ballDirX, ballDirY

#Checks is the ball has hit a paddle, and 'bounces' ball off it.
def checkHitBall(ball, paddle1, paddle2, ballDirX):
    if ballDirX == -1 and paddle1.right == ball.left and paddle1.top < ball.top and paddle1.bottom > ball.bottom:
        return -1
    elif ballDirX == 1 and paddle2.left == ball.right and paddle2.top < ball.top and paddle2.bottom > ball.bottom:
        return -1
    else: return 1

#Checks to see if a point has been scored returns new score
def checkPointScored(paddle1, ball, score, ballDirX):
    #reset points if left wall is hit
    if ball.left == LINETHICKNESS:
        return 0
    #1 point for hitting the ball
    elif ballDirX == -1 and paddle1.right == ball.left and paddle1.top < ball.top and paddle1.bottom > ball.bottom:
        score += 1
        return score
    #5 points for beating the other paddle
    elif ball.right == WINDOWWIDTH - LINETHICKNESS:
        score += 5
        return score
    #if no points scored, return score unchanged
    else: return score

#Artificial Intelligence of computer player
def artificialIntelligence(ball, ballDirX, paddle2):
    #If ball is moving away from paddle, center bat
    if ballDirX == -1:
        if paddle2.centery < (WINDOWHEIGHT/2):
            paddle2.y += 1
        elif paddle2.centery > (WINDOWHEIGHT/2):
            paddle2.y -= 1
    #if ball moving towards bat, track its movement.
    elif ballDirX == 1:
        if paddle2.centery < ball.centery:
            paddle2.y += 1
        else:
            paddle2.y -=1
    return paddle2

#Displays the current score on the screen
def displayScore(score):
    resultSurf = BASICFONT.render('Score = %s' %(score), True, WHITE)
    resultRect = resultSurf.get_rect()
    resultRect.topleft = (WINDOWWIDTH - 150, 25)
    DISPLAYSURF.blit(resultSurf, resultRect)

#Main function
def main():
    pygame.init()
    global DISPLAYSURF
    ##Font information
    global BASICFONT, BASICFONTSIZE
    BASICFONTSIZE = 20
    BASICFONT = pygame.font.Font('freesansbold.ttf', BASICFONTSIZE)

    FPSCLOCK = pygame.time.Clock()
    DISPLAYSURF = pygame.display.set_mode((WINDOWWIDTH,WINDOWHEIGHT))
    pygame.display.set_caption('Pong')

    #Initiate variable and set starting positions
    #any future changes made within rectangles
    ballX = WINDOWWIDTH/2 - LINETHICKNESS/2
    ballY = WINDOWHEIGHT/2 - LINETHICKNESS/2
    playerOnePosition = (WINDOWHEIGHT - PADDLESIZE) /2
    playerTwoPosition = (WINDOWHEIGHT - PADDLESIZE) /2
    score = 0

    #Keeps track of ball direction
    ballDirX = -1 ## -1 = left 1 = right
    ballDirY = -1 ## -1 = up 1 = down

    #Creates Rectangles for ball and paddles.
    paddle1 = pygame.Rect(PADDLEOFFSET,playerOnePosition, LINETHICKNESS,PADDLESIZE)
    paddle2 = pygame.Rect(WINDOWWIDTH - PADDLEOFFSET - LINETHICKNESS, playerTwoPosition, LINETHICKNESS,PADDLESIZE)
    ball = pygame.Rect(ballX, ballY, LINETHICKNESS, LINETHICKNESS)

    #Draws the starting position of the Arena
    drawArena()
    drawPaddle(paddle1)
    drawPaddle(paddle2)
    drawBall(ball)

    pygame.mouse.set_visible(0) # make cursor invisible

    while True: #main game loop
        for event in pygame.event.get():
            if event.type == QUIT:
                pygame.quit()
                sys.exit()
            # mouse movement commands
            elif event.type == MOUSEMOTION:
                mousex, mousey = event.pos
                paddle1.y = mousey

        drawArena()
        drawPaddle(paddle1)
        drawPaddle(paddle2)
        drawBall(ball)

        ball = moveBall(ball, ballDirX, ballDirY)
        ballDirX, ballDirY = checkEdgeCollision(ball, ballDirX, ballDirY)
        score = checkPointScored(paddle1, ball, score, ballDirX)
        ballDirX = ballDirX * checkHitBall(ball, paddle1, paddle2, ballDirX)
        paddle2 = artificialIntelligence (ball, ballDirX, paddle2)

        displayScore(score)

        pygame.display.update()
        FPSCLOCK.tick(FPS)

if __name__=='__main__':
    main()
Most importantly don't be daunted! All will be revealed throughout this tutorial.
Stage 1 - Create a blank screen
import pygame, sys
from pygame.locals import *

# Number of frames per second
# Change this value to speed up or slow down your game
FPS = 200

#Global Variables to be used through our program
WINDOWWIDTH = 400
WINDOWHEIGHT = 300

#Main function
def main():
    pygame.init()
    global DISPLAYSURF

    FPSCLOCK = pygame.time.Clock()
    DISPLAYSURF = pygame.display.set_mode((WINDOWWIDTH,WINDOWHEIGHT))
    pygame.display.set_caption('Pong')

    while True: #main game loop
        for event in pygame.event.get():
            if event.type == QUIT:
                pygame.quit()
                sys.exit()

        pygame.display.update()
        FPSCLOCK.tick(FPS)

if __name__=='__main__':
    main()
Ok so where do we start? Well when programming in Pygame I always start with creating a blank screen.
The first thing we need to do is to import the pygame libraries into our program so we have access to them.
We are also importing the sys libraries which we will use later in this section to exit our game.
import pygame, sys
from pygame.locals import *
We will then set a global variable which will control the speed of the program. We do this by varying the number of Frame Per Second or FPS for short. For now we will set this to 200, but can vary this later.
# Number of frames per second
# Change this value to speed up or slow down your game
FPS = 200
Remember any line which starts with a # is not seen by the program when it is running. We use this to allow us to write notes about our code. You will see I do this a lot throughout this program. Comments are very useful when coming back to read your code at a later date.
We also need some global variables for our window size. It is much easier when reading your program at a later date to remember what WINDOWHEIGHT means rather than a value such as 400 spread throughout your program. We will be able to call these variables at any time during our program.
#Global Variables to be used through our program
WINDOWWIDTH = 400
WINDOWHEIGHT = 300
Now we get into writing the main function of the program.
As with any function we have to define the function before calling it.
def main():
The next line is needed to initialise pygame.
pygame.init()
Pygame works by drawing onto surfaces. This next line creates the main surface we will use throughout our program. We have made it a global variable so we can access it later. Why did we have to use the word global on this variable and not on the previous variables? Well adding global allows us to modify the value later on. We will be changing our surface, so it's important we can modify it when we need to.
global DISPLAYSURF
The next line relates to the fact we want to set the frame rate ourselves, rather than allowing the program to run as fast as it wants.
FPSCLOCK = pygame.time.Clock()
Now we assign some information to our surface, which sets the display width and height.
DISPLAYSURF = pygame.display.set_mode((WINDOWWIDTH,WINDOWHEIGHT))
We set the height and the width to 400 and 300 respectively using the variables we created earlier. Notice how reading WINDOWHEIGHT and WINDOWWIDTH makes it a lot easier to understand what this line means rather than reading 400,300?
Next we set the title of our window. You can put anything you want here, but I am going to call my window 'Pong'
pygame.display.set_caption('Pong')
Now we get into the business end of our program with
while True: #main game loop
This is an eternal loop that will keep running until the game is quit.
The first thing we should do is ensure we can quit! This is achieved during the next four lines of code.
        for event in pygame.event.get():
            if event.type == QUIT:
                pygame.quit()
                sys.exit()
For now we are only creating a blank screen so our program is not going to do anything. This will of course change later.
Therefore we can just ask the screen to update.
pygame.display.update()
We need the next line to tell our program to set the Frames Per Second (FPS) rate to use the FPS variable we defined earlier.
FPSCLOCK.tick(FPS)
That is the end of our main function.
There are a couple of lines we need to type in to call our main function.
if __name__=='__main__':
    main()
You should now save your game and press F5. Hopefully you see a window similar to this?
Remember to save your work often as you go through the program. It's not much fun typing the same thing in twice!
Stage 2 - Draw the Arena, the paddles and the ball.
import pygame, sys
from pygame.locals import *

# Number of frames per second
# Change this value to speed up or slow down your game
FPS = 200

#Global Variables to be used through our program
WINDOWWIDTH = 400
WINDOWHEIGHT = 300
LINETHICKNESS = 10
PADDLESIZE = 50
PADDLEOFFSET = 20

# Set up the colours
BLACK     = (0  ,0  ,0  )
WHITE     = (255,255,255)

#Draws the arena the game will be played in.
def drawArena():
    DISPLAYSURF.fill((0,0,0))
    #Draw outline of arena
    pygame.draw.rect(DISPLAYSURF, WHITE, ((0,0),(WINDOWWIDTH,WINDOWHEIGHT)), LINETHICKNESS*2)
    #Draw centre line
    pygame.draw.line(DISPLAYSURF, WHITE, ((WINDOWWIDTH/2),0),((WINDOWWIDTH/2),WINDOWHEIGHT), (LINETHICKNESS/4))

#Draws the paddle
def drawPaddle(paddle):
    #Stops paddle moving too low
    if paddle.bottom > WINDOWHEIGHT - LINETHICKNESS:
        paddle.bottom = WINDOWHEIGHT - LINETHICKNESS
    #Stops paddle moving too high
    elif paddle.top < LINETHICKNESS:
        paddle.top = LINETHICKNESS
    #Draws paddle
    pygame.draw.rect(DISPLAYSURF, WHITE, paddle)

#draws the ball
def drawBall(ball):
    pygame.draw.rect(DISPLAYSURF, WHITE, ball)

#Main function
def main():
    pygame.init()
    global DISPLAYSURF

    FPSCLOCK = pygame.time.Clock()
    DISPLAYSURF = pygame.display.set_mode((WINDOWWIDTH,WINDOWHEIGHT))
    pygame.display.set_caption('Pong')

    #Initiate variable and set starting positions
    #any future changes made within rectangles
    ballX = WINDOWWIDTH/2 - LINETHICKNESS/2
    ballY = WINDOWHEIGHT/2 - LINETHICKNESS/2
    playerOnePosition = (WINDOWHEIGHT - PADDLESIZE) /2
    playerTwoPosition = (WINDOWHEIGHT - PADDLESIZE) /2

    #Creates Rectangles for ball and paddles.
    paddle1 = pygame.Rect(PADDLEOFFSET,playerOnePosition, LINETHICKNESS,PADDLESIZE)
    paddle2 = pygame.Rect(WINDOWWIDTH - PADDLEOFFSET - LINETHICKNESS, playerTwoPosition, LINETHICKNESS,PADDLESIZE)
    ball = pygame.Rect(ballX, ballY, LINETHICKNESS, LINETHICKNESS)

    #Draws the starting position of the Arena
    drawArena()
    drawPaddle(paddle1)
    drawPaddle(paddle2)
    drawBall(ball)

    while True: #main game loop
        for event in pygame.event.get():
            if event.type == QUIT:
                pygame.quit()
                sys.exit()

        drawArena()
        drawPaddle(paddle1)
        drawPaddle(paddle2)
        drawBall(ball)

        pygame.display.update()
        FPSCLOCK.tick(FPS)

if __name__=='__main__':
    main()
Stage 1 was mainly some grunt work to write the bare minimum to get our game to work. The fun starts now. :-)
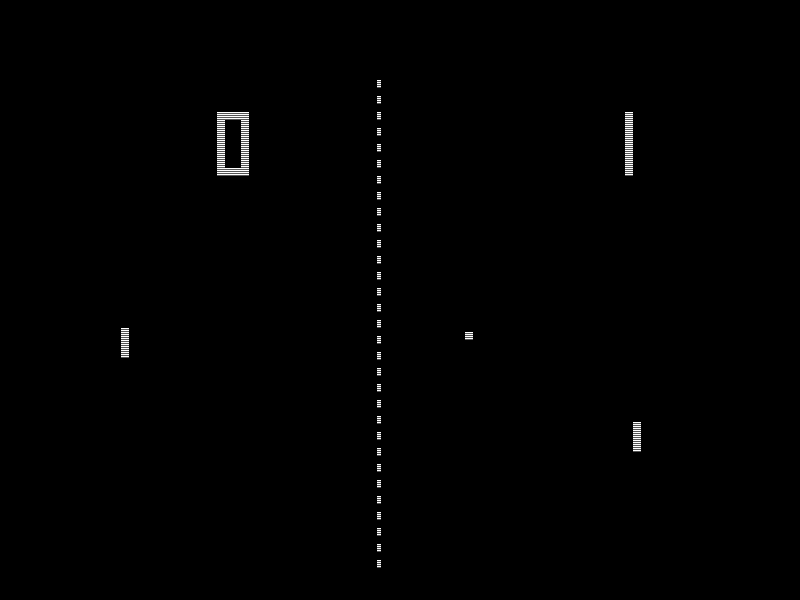
In stage 2 we will be drawing our arena, the paddles and the ball.
Below the other global variables defining the height and the width we will add a few more variables. Keeping these all grouped together makes it easier to read the code again at a later date.
LINETHICKNESS = 10
PADDLESIZE = 50
PADDLEOFFSET = 20
Again it is easier to read our code if we refer to LINETHICKNESS rather than 10 throughout our code.
LINETHICKNESS will be used to determine the thickness of the lines throughout our program.
PADDLESIZE is the length of the paddle.
PADDLEOFFSET is the distance the paddle is from the arena edges.
You can play around with all these variables later and see what happens.
I also know that I will need my screen to have black and white elements.
For ease I have set up some variables for the colours. The three values refer to the amount of Red, Green or Blue (RGB) in the colour.
# Set up the colours
BLACK     = (0  ,0  ,0  )
WHITE     = (255,255,255)
Lets jump back into our main function.
We know that at some point we will expect our ball to move around the screen i.e. that it will move in X and Y. Our paddles however will move up and down i.e only move in Y.
As a starting point we shall place the ball and the paddles in their central position.
We will be defining our ball and paddles using rectangles. These will be defined by stating the top left co-ordinate of each rectangle and then the length and width of each.
Let us create some variables for the ball and each paddle, and assign them values that will position then in their central positions.
    #Initiate variable and set starting positions
    #any future changes made within rectangles
    ballX = WINDOWWIDTH/2 - LINETHICKNESS/2
    ballY = WINDOWHEIGHT/2 - LINETHICKNESS/2
    playerOnePosition = (WINDOWHEIGHT - PADDLESIZE) /2
    playerTwoPosition = (WINDOWHEIGHT - PADDLESIZE) /2
So if we want to place the ball in the centre, why not use WINDOWWIDTH / 2? Well that would place the top of the ball in the centre of the screen and not the centre of the ball. We need to reduce the position by half the ball size, which is half of the LINETHICKNESS.
You can see we do the same for the paddle positions. This time I have shown the subtraction before dividing the whole value by two.
Now we have our starting co-ordinates, let us create a rectangle for the ball and the paddles.
The format for creating a rectangle is as follows.
pygame.Rect(X co-ordinate, Y co-ordinate, Width of Rectangle, Length of Rectangle)
As we have just defined all this information we can easily create the three rectangles,
    #Creates Rectangles for ball and paddles.
    paddle1 = pygame.Rect(PADDLEOFFSET,playerOnePosition, LINETHICKNESS,PADDLESIZE)
    paddle2 = pygame.Rect(WINDOWWIDTH - PADDLEOFFSET - LINETHICKNESS, playerTwoPosition, LINETHICKNESS,PADDLESIZE)
    ball = pygame.Rect(ballX, ballY, LINETHICKNESS, LINETHICKNESS)
For paddle 1 we use an X co-ordinate of PADDLEOFFSET which is defining the distance from the left hand side. Paddle 2 needs a little more work as this is on the right hand side.
The X co-ordinate for paddle 2 needs to be the width of the window (WINDOWWIDTH) minus the paddle offset (PADDLEOFFSET). However this would take us to the right hand side of the paddle, so we also need to minus off the thickness of the paddle (LINETHICKNESS). Therefore the X co-ordinate of paddle 2 would be WINDOWWIDTH - PADDLEOFFSET - LINETHICKNESS
While we have defined the starting positions, and then the required rectangles, we have not actually drawn anything yet. To make it easier lets create a separate function to draw the arena, the two paddles and the ball.
The code to call these functions is positioned directly below the rectangles we have created, and will set up our starting screen.
    #Draws the starting position of the Arena
    drawArena()
    drawPaddle(paddle1)
    drawPaddle(paddle2)
    drawBall(ball)
You will see that for the two players and the ball we pass the appropriate rectangle into the function, for the arena we don't pass anything into that function. The reason is as we move the paddles and the ball we will be updating the rectangle position to reflect the new position of these items. The arena remains the same throughout the game so the arena function will always draw the same thing regardless of where the ball and the paddles are.
As the game progresses we will be moving the ball and the paddles around, so we should update the screen every tick or FPS.
To do this we will call the same functions but this time within our while loop. This will ensure our game is updated so many times per second to match out FPS rate.
        drawArena()
        drawPaddle(paddle1)
        drawPaddle(paddle2)
        drawBall(ball)
Ok, we should now write these four functions.
Starting with drawArena()
Directly below where we defined the two colours type the following function. I will show you the whole function, then we will look at it line by line.
#Draws the arena the game will be played in.
def drawArena():
    DISPLAYSURF.fill((0,0,0))
    #Draw outline of arena
    pygame.draw.rect(DISPLAYSURF, WHITE, ((0,0),(WINDOWWIDTH,WINDOWHEIGHT)), LINETHICKNESS*2)
    #Draw centre line
    pygame.draw.line(DISPLAYSURF, WHITE, ((WINDOWWIDTH/2),0),((WINDOWWIDTH/2),WINDOWHEIGHT), (LINETHICKNESS/4))
The first line defines the function name, and the fact the brackets are empty shows we are passing nothing into the function.
Firstly we fill the screen background so it is all white.
DISPLAYSURF.fill((0,0,0))
Now we want to draw a border all around the arena. We can do this as a rectangle, but rather than filling the rectangle as we did with the paddles and the ball we will make it hollow. This requires us to add an extra parameter which defines the thickness of the line.
    #Draw outline of arena
    pygame.draw.rect(DISPLAYSURF, WHITE, ((0,0),(WINDOWWIDTH,WINDOWHEIGHT)), LINETHICKNESS*2)
Let us analyse this line a little more.
The DISPLAYSURF tells the program which surface we want to draw onto. In our case we will use DISPLAYSURF.
WHITE tells us what colour the rectangle should be.
((0,0),(WINDOWWIDTH,WINDOWHEIGHT)) defines a rectangle. (0,0) are the (left, top) co-ordinates, and (WINDOWWIDTH,WINDOWHEIGHT) are the width and height of the rectangle. Notice these are all within a set of brackets.
Now we need to define the thickness of the line. Why have we used LINETHICKNESS * 2? Well our rectangle is around the edge of our window, and when we give it a thickness, half the line thickness is on the inside of the rectangle and half on the outside. Doubling the thickness means there is a total line of LINETHICKNESS on the inside of the rectangle, which you will see and an equal amount on the outside which you cannot see.
Any good court should have a centre line, so we will draw one in our arena.
    #Draw centre line
    pygame.draw.line(DISPLAYSURF, WHITE, ((WINDOWWIDTH/2),0),((WINDOWWIDTH/2),WINDOWHEIGHT), (LINETHICKNESS/4))
This is very similar syntax to the rectangle but ((WINDOWWIDTH/2),0) are the starting (x,y) co-ordinates of the line and ((WINDOWWIDTH/2),WINDOWHEIGHT) are the end co-ordinates.
We only want this to be a thin line so we use LINETHICKNESS / 4 to indicate its width.
There we go that is all that is needed to draw the arena, so lets move swiftly onwards.
We will create a function to draw the paddle. Now as we know we will want to draw a paddle for Paddle1 and Paddle2, we should be able to use the same function for both.
#Draws the paddle
def drawPaddle(paddle):
    #Stops paddle moving too low
    if paddle.bottom > WINDOWHEIGHT - LINETHICKNESS:
        paddle.bottom = WINDOWHEIGHT - LINETHICKNESS
    #Stops paddle moving too high
    elif paddle.top < LINETHICKNESS:
        paddle.top = LINETHICKNESS
    #Draws paddle
    pygame.draw.rect(DISPLAYSURF, WHITE, paddle)
Again the first line defines the function name and tells us we are accepting paddle as a parameter into the function. Now when we called the function earlier, one time we passed paddle1 into the function, and the second time paddle2. Well to help re-use code whatever we pass into this function will be called paddle. This means we can pass both paddle1 and paddle2 into it and it will refer to them as just paddle. This saves us having to write the same function twice, once for paddle1 and once for paddle2.
Now I want to make sure that the paddle will stay within the arena. If it tries to move out of the bottom of the arena we limit it to its lowest point, then do something similar at the top.
As paddle is a rectangle we can isolate the values that make up the rectangle, such as x and y. However pygame gives us more control than that so we can access the top, the bottom, left or right of the rectangle. In fact there are loads of options all listed on the pygame.rect page. If you would like to explore these yourself have a look at this link.
To ensure the paddle doesn't move off the bottom of the arena, it is easier if we look at the bottom of the paddle. This is done with paddle.bottom.
We don't want our paddle bottom to move beyond the arena walls. The bottom arena wall is the height of the window minus the thickness of the wall. Our code therefore looks like this.
    #Stops paddle moving too low
    if paddle.bottom > WINDOWHEIGHT - LINETHICKNESS:
        paddle.bottom = WINDOWHEIGHT - LINETHICKNESS
We simply say if it moves too far, make it equal to the furthest point we want it to go to.
The same is done to stop it moving too high. However this time we look at the top of the paddle using paddle.top
    #Stops paddle moving too high
    elif paddle.top < LINETHICKNESS:
        paddle.top = LINETHICKNESS
Now we draw our rectangle
    #Draws paddle
    pygame.draw.rect(DISPLAYSURF, WHITE, paddle)
This is exactly the same as when we drew the rectangle for the arena. However instead of defining the rectangle inside the brackets, we use our predefined rectangle - paddle. Nice and easy.
Finally we will write the function to draw the ball.
#draws the ball
def drawBall(ball):
    pygame.draw.rect(DISPLAYSURF, WHITE, ball)
We name the function drawBall and show it will accept ball.
Then as we have done with the paddles we simply draw the ball. Very simple.
Saving and running your program should show the arena with 2 paddles and a ball.
Stage 3 - Move the ball around.
import pygame, sys
from pygame.locals import *

# Number of frames per second
# Change this value to speed up or slow down your game
FPS = 200

#Global Variables to be used through our program
WINDOWWIDTH = 400
WINDOWHEIGHT = 300
LINETHICKNESS = 10
PADDLESIZE = 50
PADDLEOFFSET = 20

# Set up the colours
BLACK     = (0  ,0  ,0  )
WHITE     = (255,255,255)

#Draws the arena the game will be played in.
def drawArena():
    DISPLAYSURF.fill((0,0,0))
    #Draw outline of arena
    pygame.draw.rect(DISPLAYSURF, WHITE, ((0,0),(WINDOWWIDTH,WINDOWHEIGHT)), LINETHICKNESS*2)
    #Draw centre line
    pygame.draw.line(DISPLAYSURF, WHITE, ((WINDOWWIDTH/2),0),((WINDOWWIDTH/2),WINDOWHEIGHT), (LINETHICKNESS/4))

#Draws the paddle
def drawPaddle(paddle):
    #Stops paddle moving too low
    if paddle.bottom > WINDOWHEIGHT - LINETHICKNESS:
        paddle.bottom = WINDOWHEIGHT - LINETHICKNESS
    #Stops paddle moving too high
    elif paddle.top < LINETHICKNESS:
        paddle.top = LINETHICKNESS
    #Draws paddle
    pygame.draw.rect(DISPLAYSURF, WHITE, paddle)

#draws the ball
def drawBall(ball):
    pygame.draw.rect(DISPLAYSURF, WHITE, ball)

#moves the ball returns new position
def moveBall(ball, ballDirX, ballDirY):
    ball.x += ballDirX
    ball.y += ballDirY
    return ball

#Main function
def main():
    pygame.init()
    global DISPLAYSURF

    FPSCLOCK = pygame.time.Clock()
    DISPLAYSURF = pygame.display.set_mode((WINDOWWIDTH,WINDOWHEIGHT))
    pygame.display.set_caption('Pong')

    #Initiate variable and set starting positions
    #any future changes made within rectangles
    ballX = WINDOWWIDTH/2 - LINETHICKNESS/2
    ballY = WINDOWHEIGHT/2 - LINETHICKNESS/2
    playerOnePosition = (WINDOWHEIGHT - PADDLESIZE) /2
    playerTwoPosition = (WINDOWHEIGHT - PADDLESIZE) /2

    #Keeps track of ball direction
    ballDirX = -1 ## -1 = left 1 = right
    ballDirY = -1 ## -1 = up 1 = down

    #Creates Rectangles for ball and paddles.
    paddle1 = pygame.Rect(PADDLEOFFSET,playerOnePosition, LINETHICKNESS,PADDLESIZE)
    paddle2 = pygame.Rect(WINDOWWIDTH - PADDLEOFFSET - LINETHICKNESS, playerTwoPosition, LINETHICKNESS,PADDLESIZE)
    ball = pygame.Rect(ballX, ballY, LINETHICKNESS, LINETHICKNESS)

    #Draws the starting position of the Arena
    drawArena()
    drawPaddle(paddle1)
    drawPaddle(paddle2)
    drawBall(ball)

    while True: #main game loop
        for event in pygame.event.get():
            if event.type == QUIT:
                pygame.quit()
                sys.exit()

        drawArena()
        drawPaddle(paddle1)
        drawPaddle(paddle2)
        drawBall(ball)

        ball = moveBall(ball, ballDirX, ballDirY)

        pygame.display.update()
        FPSCLOCK.tick(FPS)

if __name__=='__main__':
    main()
While we can see our game is taking shape, there is not much actually happening. We will change this now by moving the ball around. First lets determine which way the ball is moving.
My method of doing this is to create two variables. One for the direction of the ball in X, and one in Y. This allows us to control the ball in each axis independently. Lets create these variables below our initial ball and player positions.
    #Keeps track of ball direction
    ballDirX = -1 ## -1 = left 1 = right
    ballDirY = -1 ## -1 = up 1 = down
Lets say if the ball is moving left, we will make ballDirX = -1, and if it is moving right we will make it 1
Similarly if it is moving up we will make ballDirY = -1 and down ballDirY = 1.
Every FPS we will want to move the ball. Therefore we will write a function which will move the ball by updating the co-ordinates stored in the ball rectangle. We will need to pass into the function the value for ball, and the X and Y directions, ballDirX and ballDirY. Under where we called the drawBall() function in our main loop add the following line to call the moveBall function.
ball = moveBall(ball, ballDirX, ballDirY)
Whatever is output from our moveBall function will become the new value of ball.
Outside the main loop with the other functions lets create the function moveBall below the drawBall function.
#moves the ball returns new position
def moveBall(ball, ballDirX, ballDirY):
    ball.x += ballDirX
    ball.y += ballDirY
    return ball
After naming the function listing the parameters being passed into it we simply add to the x value of ball the value from ballDirX.
ball.x += ballDirX
If you are confused about the meaning of += remember a += b is equal to a = a + b.
This means if the ball should be moving left, we add -1 onto the co-ordinates of the ball, which moves the ball left. If ballDirX is 1, ball.x would increase by 1, moving it to the right.
We then do a similar thing for ball.y
ball.y += ballDirY
Finally we return the modified ball back into our main function.
return ball
Time to save your file and test out step 3 moving the ball.
Step 4 - Check collision with all edges
import pygame, sys
from pygame.locals import *

# Number of frames per second
# Change this value to speed up or slow down your game
FPS = 200

#Global Variables to be used through our program
WINDOWWIDTH = 400
WINDOWHEIGHT = 300
LINETHICKNESS = 10
PADDLESIZE = 50
PADDLEOFFSET = 20

# Set up the colours
BLACK     = (0  ,0  ,0  )
WHITE     = (255,255,255)

#Draws the arena the game will be played in.
def drawArena():
    DISPLAYSURF.fill((0,0,0))
    #Draw outline of arena
    pygame.draw.rect(DISPLAYSURF, WHITE, ((0,0),(WINDOWWIDTH,WINDOWHEIGHT)), LINETHICKNESS*2)
    #Draw centre line
    pygame.draw.line(DISPLAYSURF, WHITE, ((WINDOWWIDTH/2),0),((WINDOWWIDTH/2),WINDOWHEIGHT), (LINETHICKNESS/4))

#Draws the paddle
def drawPaddle(paddle):
    #Stops paddle moving too low
    if paddle.bottom > WINDOWHEIGHT - LINETHICKNESS:
        paddle.bottom = WINDOWHEIGHT - LINETHICKNESS
    #Stops paddle moving too high
    elif paddle.top < LINETHICKNESS:
        paddle.top = LINETHICKNESS
    #Draws paddle
    pygame.draw.rect(DISPLAYSURF, WHITE, paddle)

#draws the ball
def drawBall(ball):
    pygame.draw.rect(DISPLAYSURF, WHITE, ball)

#moves the ball returns new position
def moveBall(ball, ballDirX, ballDirY):
    ball.x += ballDirX
    ball.y += ballDirY
    return ball

#Checks for a collision with a wall, and 'bounces' ball off it.
#Returns new direction
def checkEdgeCollision(ball, ballDirX, ballDirY):
    if ball.top == (LINETHICKNESS) or ball.bottom == (WINDOWHEIGHT - LINETHICKNESS):
        ballDirY = ballDirY * -1
    if ball.left == (LINETHICKNESS) or ball.right == (WINDOWWIDTH - LINETHICKNESS):
        ballDirX = ballDirX * -1
    return ballDirX, ballDirY

#Main function
def main():
    pygame.init()
    global DISPLAYSURF

    FPSCLOCK = pygame.time.Clock()
    DISPLAYSURF = pygame.display.set_mode((WINDOWWIDTH,WINDOWHEIGHT))
    pygame.display.set_caption('Pong')

    #Initiate variable and set starting positions
    #any future changes made within rectangles
    ballX = WINDOWWIDTH/2 - LINETHICKNESS/2
    ballY = WINDOWHEIGHT/2 - LINETHICKNESS/2
    playerOnePosition = (WINDOWHEIGHT - PADDLESIZE) /2
    playerTwoPosition = (WINDOWHEIGHT - PADDLESIZE) /2

    #Keeps track of ball direction
    ballDirX = -1 ## -1 = left 1 = right
    ballDirY = -1 ## -1 = up 1 = down

    #Creates Rectangles for ball and paddles.
    paddle1 = pygame.Rect(PADDLEOFFSET,playerOnePosition, LINETHICKNESS,PADDLESIZE)
    paddle2 = pygame.Rect(WINDOWWIDTH - PADDLEOFFSET - LINETHICKNESS, playerTwoPosition, LINETHICKNESS,PADDLESIZE)
    ball = pygame.Rect(ballX, ballY, LINETHICKNESS, LINETHICKNESS)

    #Draws the starting position of the Arena
    drawArena()
    drawPaddle(paddle1)
    drawPaddle(paddle2)
    drawBall(ball)

    while True: #main game loop
        for event in pygame.event.get():
            if event.type == QUIT:
                pygame.quit()
                sys.exit()

        drawArena()
        drawPaddle(paddle1)
        drawPaddle(paddle2)
        drawBall(ball)

        ball = moveBall(ball, ballDirX, ballDirY)
        ballDirX, ballDirY = checkEdgeCollision(ball, ballDirX, ballDirY)

        pygame.display.update()
        FPSCLOCK.tick(FPS)

if __name__=='__main__':
    main()
So how is that moving the ball function working out for you? Well the ball certainly moves, but it disappears off the side of the arena, and keeps going!
How will we deal with this? Well, if the ball hits one of the edges, we need to reverse the direction it is travelling in. If it hits the top or bottom edge we should reverse the ballDirY, and if it hits the left or right edge we should reverse ballDirX. We will do this in a function, but before that in our main game loop lets add a call to that function. So below ball = moveBall(ball, ballDirX, ballDirY) add the following line.
ballDirX, ballDirY = checkEdgeCollision(ball, ballDirX, ballDirY)
So we are calling a function checkEdgeCollision. The function will need to know the ball position and the current direction in X and Y, therefore we pass those parameters into the function.
Any collision will need to change ballDirX and ballDirY, so the output of the function will modify these as required.
OK time to write the function.
Outside of the main function underneath the moveBall function we will write our function called checkEdgeCollision
#Checks for a collision with a wall, and 'bounces' ball off it.
#Returns new direction
def checkEdgeCollision(ball, ballDirX, ballDirY):
    if ball.top == (LINETHICKNESS) or ball.bottom == (WINDOWHEIGHT - LINETHICKNESS):
        ballDirY = ballDirY * -1
    if ball.left == (LINETHICKNESS) or ball.right == (WINDOWWIDTH - LINETHICKNESS):
        ballDirX = ballDirX * -1
    return ballDirX, ballDirY
So after naming the function we check to see if the top of the ball has hit the top of the arena, or the bottom of the ball has hit the bottom of the arena.
    if ball.top == (LINETHICKNESS) or ball.bottom == (WINDOWHEIGHT - LINETHICKNESS):
        ballDirY = ballDirY * -1
If that is the case we multiply our Y direction by -1.
For those whose mathematics is not great,
1 x -1 = -1
-1 x -1 = 1
Therefore if the direction was negative, it becomes positive and vice versa.
We do the same thing for the left and right of the ball.
    if ball.left == (LINETHICKNESS) or ball.right == (WINDOWWIDTH - LINETHICKNESS):
        ballDirX = ballDirX * -1
and finally we return the X and Y directions, as our code is expecting us to.
return ballDirX, ballDirY
Wow that edge detection function was pretty easy huh?
Again save and test your code. Do you see a ball bouncing around the screen?
Stage 5 - Move the players paddle.
import pygame, sys
from pygame.locals import *

# Number of frames per second
# Change this value to speed up or slow down your game
FPS = 200

#Global Variables to be used through our program
WINDOWWIDTH = 400
WINDOWHEIGHT = 300
LINETHICKNESS = 10
PADDLESIZE = 50
PADDLEOFFSET = 20

# Set up the colours
BLACK     = (0  ,0  ,0  )
WHITE     = (255,255,255)

#Draws the arena the game will be played in.
def drawArena():
    DISPLAYSURF.fill((0,0,0))
    #Draw outline of arena
    pygame.draw.rect(DISPLAYSURF, WHITE, ((0,0),(WINDOWWIDTH,WINDOWHEIGHT)), LINETHICKNESS*2)
    #Draw centre line
    pygame.draw.line(DISPLAYSURF, WHITE, ((WINDOWWIDTH/2),0),((WINDOWWIDTH/2),WINDOWHEIGHT), (LINETHICKNESS/4))

#Draws the paddle
def drawPaddle(paddle):
    #Stops paddle moving too low
    if paddle.bottom > WINDOWHEIGHT - LINETHICKNESS:
        paddle.bottom = WINDOWHEIGHT - LINETHICKNESS
    #Stops paddle moving too high
    elif paddle.top < LINETHICKNESS:
        paddle.top = LINETHICKNESS
    #Draws paddle
    pygame.draw.rect(DISPLAYSURF, WHITE, paddle)

#draws the ball
def drawBall(ball):
    pygame.draw.rect(DISPLAYSURF, WHITE, ball)

#moves the ball returns new position
def moveBall(ball, ballDirX, ballDirY):
    ball.x += ballDirX
    ball.y += ballDirY
    return ball

#Checks for a collision with a wall, and 'bounces' ball off it.
#Returns new direction
def checkEdgeCollision(ball, ballDirX, ballDirY):
    if ball.top == (LINETHICKNESS) or ball.bottom == (WINDOWHEIGHT - LINETHICKNESS):
        ballDirY = ballDirY * -1
    if ball.left == (LINETHICKNESS) or ball.right == (WINDOWWIDTH - LINETHICKNESS):
        ballDirX = ballDirX * -1
    return ballDirX, ballDirY

#Main function
def main():
    pygame.init()
    global DISPLAYSURF

    FPSCLOCK = pygame.time.Clock()
    DISPLAYSURF = pygame.display.set_mode((WINDOWWIDTH,WINDOWHEIGHT))
    pygame.display.set_caption('Pong')

    #Initiate variable and set starting positions
    #any future changes made within rectangles
    ballX = WINDOWWIDTH/2 - LINETHICKNESS/2
    ballY = WINDOWHEIGHT/2 - LINETHICKNESS/2
    playerOnePosition = (WINDOWHEIGHT - PADDLESIZE) /2
    playerTwoPosition = (WINDOWHEIGHT - PADDLESIZE) /2

    #Keeps track of ball direction
    ballDirX = -1 ## -1 = left 1 = right
    ballDirY = -1 ## -1 = up 1 = down

    #Creates Rectangles for ball and paddles.
    paddle1 = pygame.Rect(PADDLEOFFSET,playerOnePosition, LINETHICKNESS,PADDLESIZE)
    paddle2 = pygame.Rect(WINDOWWIDTH - PADDLEOFFSET - LINETHICKNESS, playerTwoPosition, LINETHICKNESS,PADDLESIZE)
    ball = pygame.Rect(ballX, ballY, LINETHICKNESS, LINETHICKNESS)

    #Draws the starting position of the Arena
    drawArena()
    drawPaddle(paddle1)
    drawPaddle(paddle2)
    drawBall(ball)

    pygame.mouse.set_visible(0) # make cursor invisible

    while True: #main game loop
        for event in pygame.event.get():
            if event.type == QUIT:
                pygame.quit()
                sys.exit()
            # mouse movement commands
            elif event.type == MOUSEMOTION:
                mousex, mousey = event.pos
                paddle1.y = mousey

        drawArena()
        drawPaddle(paddle1)
        drawPaddle(paddle2)
        drawBall(ball)

        ball = moveBall(ball, ballDirX, ballDirY)
        ballDirX, ballDirY = checkEdgeCollision(ball, ballDirX, ballDirY)

        pygame.display.update()
        FPSCLOCK.tick(FPS)

if __name__=='__main__':
    main()
While it is nice to see the ball moving so well, its a little frustrating we cannot hit it! I am sure we can resolve that fairly easily.
Earlier on we created an event.type which was equal to quit. Well there are a few event types in Python and one of those is checking the motion of the mouse.
Underneath sys.exit() which is the previous event type you programmed type the following.
            # mouse movement commands
            elif event.type == MOUSEMOTION:
                mousex, mousey = event.pos
                paddle1.y = mousey
The first event checked for a QUIT and then exited the game. This was held within an 'if' statement. The second part you have just typed is an 'elif' statement which is checked if the 'if' statement was not true.
elif event.type == MOUSEMOTION:
Else if (elif) the event type is mouse motion
mousex, mousey = event.pos
This gives the X and Y co-ordinates of the mouse position. Our game is not really interested in the X position, only the Y. We can therefore make the y position of paddle1 equal to the mousey position.
paddle1.y = mousey
Wow, Pygame really makes these things easy doesn't it?
If you run your game you will see you have control over your paddle. However the fact you can see the mouse cursor is a little annoying, so lets turn that off.
Just before your while True: loop in the main function type the following.
pygame.mouse.set_visible(0) # make cursor invisible
This means you cannot see the cursor in your game.
Again run your game and see if that has made it better.
Stage 6 - Move the computers paddle with 'Artificial Intelligence'
import pygame, sys
from pygame.locals import *

# Number of frames per second
# Change this value to speed up or slow down your game
FPS = 200

#Global Variables to be used through our program
WINDOWWIDTH = 400
WINDOWHEIGHT = 300
LINETHICKNESS = 10
PADDLESIZE = 50
PADDLEOFFSET = 20

# Set up the colours
BLACK     = (0  ,0  ,0  )
WHITE     = (255,255,255)

#Draws the arena the game will be played in.
def drawArena():
    DISPLAYSURF.fill((0,0,0))
    #Draw outline of arena
    pygame.draw.rect(DISPLAYSURF, WHITE, ((0,0),(WINDOWWIDTH,WINDOWHEIGHT)), LINETHICKNESS*2)
    #Draw centre line
    pygame.draw.line(DISPLAYSURF, WHITE, ((WINDOWWIDTH/2),0),((WINDOWWIDTH/2),WINDOWHEIGHT), (LINETHICKNESS/4))

#Draws the paddle
def drawPaddle(paddle):
    #Stops paddle moving too low
    if paddle.bottom > WINDOWHEIGHT - LINETHICKNESS:
        paddle.bottom = WINDOWHEIGHT - LINETHICKNESS
    #Stops paddle moving too high
    elif paddle.top < LINETHICKNESS:
        paddle.top = LINETHICKNESS
    #Draws paddle
    pygame.draw.rect(DISPLAYSURF, WHITE, paddle)


#draws the ball
def drawBall(ball):
    pygame.draw.rect(DISPLAYSURF, WHITE, ball)

#moves the ball returns new position
def moveBall(ball, ballDirX, ballDirY):
    ball.x += ballDirX
    ball.y += ballDirY
    return ball

#Checks for a collision with a wall, and 'bounces' ball off it.
#Returns new direction
def checkEdgeCollision(ball, ballDirX, ballDirY):
    if ball.top == (LINETHICKNESS) or ball.bottom == (WINDOWHEIGHT - LINETHICKNESS):
        ballDirY = ballDirY * -1
    if ball.left == (LINETHICKNESS) or ball.right == (WINDOWWIDTH - LINETHICKNESS):
        ballDirX = ballDirX * -1
    return ballDirX, ballDirY

#Artificial Intelligence of computer player
def artificialIntelligence(ball, ballDirX, paddle2):
    #If ball is moving away from paddle, center bat
    if ballDirX == -1:
        if paddle2.centery < (WINDOWHEIGHT/2):
            paddle2.y += 1
        elif paddle2.centery > (WINDOWHEIGHT/2):
            paddle2.y -= 1
    #if ball moving towards bat, track its movement.
    elif ballDirX == 1:
        if paddle2.centery < ball.centery:
            paddle2.y += 1
        else:
            paddle2.y -=1
    return paddle2

#Main function
def main():
    pygame.init()
    global DISPLAYSURF

    FPSCLOCK = pygame.time.Clock()
    DISPLAYSURF = pygame.display.set_mode((WINDOWWIDTH,WINDOWHEIGHT))
    pygame.display.set_caption('Pong')

    #Initiate variable and set starting positions
    #any future changes made within rectangles
    ballX = WINDOWWIDTH/2 - LINETHICKNESS/2
    ballY = WINDOWHEIGHT/2 - LINETHICKNESS/2
    playerOnePosition = (WINDOWHEIGHT - PADDLESIZE) /2
    playerTwoPosition = (WINDOWHEIGHT - PADDLESIZE) /2

    #Keeps track of ball direction
    ballDirX = -1 ## -1 = left 1 = right
    ballDirY = -1 ## -1 = up 1 = down

    #Creates Rectangles for ball and paddles.
    paddle1 = pygame.Rect(PADDLEOFFSET,playerOnePosition, LINETHICKNESS,PADDLESIZE)
    paddle2 = pygame.Rect(WINDOWWIDTH - PADDLEOFFSET - LINETHICKNESS, playerTwoPosition, LINETHICKNESS,PADDLESIZE)
    ball = pygame.Rect(ballX, ballY, LINETHICKNESS, LINETHICKNESS)

    #Draws the starting position of the Arena
    drawArena()
    drawPaddle(paddle1)
    drawPaddle(paddle2)
    drawBall(ball)

    pygame.mouse.set_visible(0) # make cursor invisible

    while True: #main game loop
        for event in pygame.event.get():
            if event.type == QUIT:
                pygame.quit()
                sys.exit()
            # mouse movement commands
            elif event.type == MOUSEMOTION:
                mousex, mousey = event.pos
                paddle1.y = mousey

        drawArena()
        drawPaddle(paddle1)
        drawPaddle(paddle2)
        drawBall(ball)

        ball = moveBall(ball, ballDirX, ballDirY)
        ballDirX, ballDirY = checkEdgeCollision(ball, ballDirX, ballDirY)
        paddle2 = artificialIntelligence (ball, ballDirX, paddle2)

        pygame.display.update()
        FPSCLOCK.tick(FPS)

if __name__=='__main__':
    main()
While being able to move your paddle is all very good, it's not much fun if the computer doesn't move his paddle. Before allowing you to hit the ball lets add some 'artificial intelligence' into the computer.
The computer is not really thinking for itself, so we are not programming Artificial Intelligence in the true sense of the word. It is just following a predetermined set of instructions.
You can think of your own method of this if you like later. I am going to make the computer player play similar to how I play squash.
- Once I have hit the ball I move to the centre of the court.
- When my opponent has hit the ball I start to follow the ball so I can hit it back.
Again we will do all the hard work in a function.
That function will need to know:
The position of the ball so it can follow it.
The direction of the ball so it knows if it is moving away or towards the computers paddle.
The position of the paddle so it can adjust its position depending on what the ball is doing.
The output will be the position of the paddle.
Therefore in our main loop lets create a call to a function called artificialIntelligence to suit our requirements.
paddle2 = artificialIntelligence (ball, ballDirX, paddle2)
Here is the function in its entirety. Have a read through and we will break it down in more detail.
#Artificial Intelligence of computer player
def artificialIntelligence(ball, ballDirX, paddle2):
    #If ball is moving away from paddle, center bat
    if ballDirX == -1:
        if paddle2.centery < (WINDOWHEIGHT/2):
            paddle2.y += 1
        elif paddle2.centery > (WINDOWHEIGHT/2):
            paddle2.y -= 1
    #if ball moving towards bat, track its movement.
    elif ballDirX == 1:
        if paddle2.centery < ball.centery:
            paddle2.y += 1
        else:
            paddle2.y -=1
    return paddle2
After naming the function with the correct parameters being passed into it we check to see if the ball is moving away from the paddle.
if ballDirX == -1:
If it is we do one of two things.
If the center of the paddle in y is higher (remember the top of the screen is position 0) than the center of the screen, we move the paddle down by one.
        if paddle2.centery < (WINDOWHEIGHT/2):
            paddle2.y += 1
Notice we use another of the great options when working with rectangles to find the center of the rectangle in y by using paddle2.centery
If it is lower, we move it up by one.
        elif paddle2.centery > (WINDOWHEIGHT/2):
            paddle2.y -= 1
We have used less than and greater than. This means if the centery is equal to the WINDOWHEIGHT/2 it wont try to move and will sit stable in the central position.
That covers if the ball is moving away from the bat. If it is moving towards the bat we said we would move the bat towards the ball.
We first define the elif part of the loop to check if the ball is moving towards the paddle.
    #if ball moving towards bat, track its movement.
    elif ballDirX == 1:
In a similar manner to when the ball was moving away from the paddle we check to see the position of the paddle this time with respect to the ball. If it is higher than the ball we increase the paddle Y co-ordinate.
        if paddle2.centery < ball.centery:
            paddle2.y += 1
Else, it must be lower so we decrease the paddle Y co-ordinate.
        else:
            paddle2.y -=1
Finally we return paddle2.
return paddle2
Right time to save and test your program.
Stage 7 - Collision with the paddle
import pygame, sys
from pygame.locals import *

# Number of frames per second
# Change this value to speed up or slow down your game
FPS = 200

#Global Variables to be used through our program
WINDOWWIDTH = 400
WINDOWHEIGHT = 300
LINETHICKNESS = 10
PADDLESIZE = 50
PADDLEOFFSET = 20

# Set up the colours
BLACK     = (0  ,0  ,0  )
WHITE     = (255,255,255)

#Draws the arena the game will be played in.
def drawArena():
    DISPLAYSURF.fill((0,0,0))
    #Draw outline of arena
    pygame.draw.rect(DISPLAYSURF, WHITE, ((0,0),(WINDOWWIDTH,WINDOWHEIGHT)), LINETHICKNESS*2)
    #Draw centre line
    pygame.draw.line(DISPLAYSURF, WHITE, ((WINDOWWIDTH/2),0),((WINDOWWIDTH/2),WINDOWHEIGHT), (LINETHICKNESS/4))

#Draws the paddle
def drawPaddle(paddle):
    #Stops paddle moving too low
    if paddle.bottom > WINDOWHEIGHT - LINETHICKNESS:
        paddle.bottom = WINDOWHEIGHT - LINETHICKNESS
    #Stops paddle moving too high
    elif paddle.top < LINETHICKNESS:
        paddle.top = LINETHICKNESS
    #Draws paddle
    pygame.draw.rect(DISPLAYSURF, WHITE, paddle)

#draws the ball
def drawBall(ball):
    pygame.draw.rect(DISPLAYSURF, WHITE, ball)

#moves the ball returns new position
def moveBall(ball, ballDirX, ballDirY):
    ball.x += ballDirX
    ball.y += ballDirY
    return ball

#Checks for a collision with a wall, and 'bounces' ball off it.
#Returns new direction
def checkEdgeCollision(ball, ballDirX, ballDirY):
    if ball.top == (LINETHICKNESS) or ball.bottom == (WINDOWHEIGHT - LINETHICKNESS):
        ballDirY = ballDirY * -1
    if ball.left == (LINETHICKNESS) or ball.right == (WINDOWWIDTH - LINETHICKNESS):
        ballDirX = ballDirX * -1
    return ballDirX, ballDirY

#Checks is the ball has hit a paddle, and 'bounces' ball off it.
def checkHitBall(ball, paddle1, paddle2, ballDirX):
    if ballDirX == -1 and paddle1.right == ball.left and paddle1.top < ball.top and paddle1.bottom > ball.bottom:
        return -1
    elif ballDirX == 1 and paddle2.left == ball.right and paddle2.top < ball.top and paddle2.bottom > ball.bottom:
        return -1
    else: return 1

#Artificial Intelligence of computer player
def artificialIntelligence(ball, ballDirX, paddle2):
    #If ball is moving away from paddle, center bat
    if ballDirX == -1:
        if paddle2.centery < (WINDOWHEIGHT/2):
            paddle2.y += 1
        elif paddle2.centery > (WINDOWHEIGHT/2):
            paddle2.y -= 1
    #if ball moving towards bat, track its movement.
    elif ballDirX == 1:
        if paddle2.centery < ball.y:
            paddle2.y += 1
        else:
            paddle2.y -=1
    return paddle2

#Main function
def main():
    pygame.init()
    global DISPLAYSURF

    FPSCLOCK = pygame.time.Clock()
    DISPLAYSURF = pygame.display.set_mode((WINDOWWIDTH,WINDOWHEIGHT))
    pygame.display.set_caption('Pong')

    #Initiate variable and set starting positions
    #any future changes made within rectangles
    ballX = WINDOWWIDTH/2 - LINETHICKNESS/2
    ballY = WINDOWHEIGHT/2 - LINETHICKNESS/2
    playerOnePosition = (WINDOWHEIGHT - PADDLESIZE) /2
    playerTwoPosition = (WINDOWHEIGHT - PADDLESIZE) /2

    #Keeps track of ball direction
    ballDirX = -1 ## -1 = left 1 = right
    ballDirY = -1 ## -1 = up 1 = down

    #Creates Rectangles for ball and paddles.
    paddle1 = pygame.Rect(PADDLEOFFSET,playerOnePosition, LINETHICKNESS,PADDLESIZE)
    paddle2 = pygame.Rect(WINDOWWIDTH - PADDLEOFFSET - LINETHICKNESS, playerTwoPosition, LINETHICKNESS,PADDLESIZE)
    ball = pygame.Rect(ballX, ballY, LINETHICKNESS, LINETHICKNESS)

    #Draws the starting position of the Arena
    drawArena()
    drawPaddle(paddle1)
    drawPaddle(paddle2)
    drawBall(ball)

    pygame.mouse.set_visible(0) # make cursor invisible

    while True: #main game loop
        for event in pygame.event.get():
            if event.type == QUIT:
                pygame.quit()
                sys.exit()
            # mouse movement commands
            elif event.type == MOUSEMOTION:
                mousex, mousey = event.pos
                paddle1.y = mousey

        drawArena()
        drawPaddle(paddle1)
        drawPaddle(paddle2)
        drawBall(ball)

        ball = moveBall(ball, ballDirX, ballDirY)
        ballDirX, ballDirY = checkEdgeCollision(ball, ballDirX, ballDirY)
        ballDirX = ballDirX * checkHitBall(ball, paddle1, paddle2, ballDirX)
        paddle2 = artificialIntelligence (ball, ballDirX, paddle2)

        pygame.display.update()
        FPSCLOCK.tick(FPS)

if __name__=='__main__':
    main()
You should now have your paddle moving around the screen nicely using the mouse and the computers paddle moving using its artificial intelligence.
However we have not programmed the software to allow the ball to collide with the paddles, so let us do that now.
As always lets call the function in our main loop to ensure it is checked every-time the FPS ticks over.
ballDirX = ballDirX * checkHitBall(ball, paddle1, paddle2, ballDirX)
We know that when the ball hits the paddle we will want to reverse the direction the ball is moving in in X.
If we make our function checkHitBall return a -1 if the ball is hit, and a 1 if it is not, then by multiplying this returned value by the value in ballDirX will give us the new ballDirX. This is similar to how we reversed the direction if the ball hit one of the sides.
So below our checkEdgeCollision function lets add a checkHitBall function.
#Checks is the ball has hit a paddle, and 'bounces' ball off it.
def checkHitBall(ball, paddle1, paddle2, ballDirX):
    if ballDirX == -1 and paddle1.right == ball.left and paddle1.top < ball.top and paddle1.bottom > ball.bottom:
        return -1
    elif ballDirX == 1 and paddle2.left == ball.right and paddle2.top < ball.top and paddle2.bottom > ball.bottom:
        return -1
    else: return 1
As this function checks if the ball has hit either paddle, we pass both paddles and the ball into the function.
def checkHitBall(ball, paddle1, paddle2, ballDirX):
Now the fun bit of seeing if the ball has hit the paddle. Pygame has a few ways of doing this such as checking to see if one rectangle has intersected another. I want to make sure my ball can only be hit from the front and not the back
if ballDirX == -1 and paddle1.right == ball.left and paddle1.top < ball.top and paddle1.bottom > ball.bottom:
This line checks four things to see if the ball has been hit.
The first things it checks the direction of the ball. We only want to ball to be classed as being hit if it is hits the paddle from the front. If it is hit from the rear it means you have missed the ball, so we will make the ball pass through the paddle until it is back in play.
The next three things it checks are to see the position of the ball relative to the paddle. It checks if the right hand side of the paddle hits the left hand side of the ball AND that the top of the ball is lower than the top of the paddle AND the bottom of the ball is higher than the bottom of the paddle.
If these three AND statements are true, then the paddle has hit the ball so we return a -1 to flip the direction.
return -1
We now do something very similar but for the computer paddle which is paddle 2. Notice we want the ball to be moving in a different direction and the right hand side of the ball will hit the left side of the paddle.
    elif ballDirX == 1 and paddle2.left == ball.right and paddle2.top < ball.top and paddle2.bottom > ball.bottom:
        return -1
Finally if nothing has been hit we should return a 1 so the direction of the ball doesn't change.
else: return 1
Step 8 - Add a scoring system
import pygame, sys
from pygame.locals import *

# Number of frames per second
# Change this value to speed up or slow down your game
FPS = 200

#Global Variables to be used through our program
WINDOWWIDTH = 400
WINDOWHEIGHT = 300
LINETHICKNESS = 10
PADDLESIZE = 50
PADDLEOFFSET = 20

# Set up the colours
BLACK     = (0  ,0  ,0  )
WHITE     = (255,255,255)

#Draws the arena the game will be played in.
def drawArena():
    DISPLAYSURF.fill((0,0,0))
    #Draw outline of arena
    pygame.draw.rect(DISPLAYSURF, WHITE, ((0,0),(WINDOWWIDTH,WINDOWHEIGHT)), LINETHICKNESS*2)
    #Draw centre line
    pygame.draw.line(DISPLAYSURF, WHITE, ((WINDOWWIDTH/2),0),((WINDOWWIDTH/2),WINDOWHEIGHT), (LINETHICKNESS/4))

#Draws the paddle
def drawPaddle(paddle):
    #Stops paddle moving too low
    if paddle.bottom > WINDOWHEIGHT - LINETHICKNESS:
        paddle.bottom = WINDOWHEIGHT - LINETHICKNESS
    #Stops paddle moving too high
    elif paddle.top < LINETHICKNESS:
        paddle.top = LINETHICKNESS
    #Draws paddle
    pygame.draw.rect(DISPLAYSURF, WHITE, paddle)

#draws the ball
def drawBall(ball):
    pygame.draw.rect(DISPLAYSURF, WHITE, ball)

#moves the ball returns new position
def moveBall(ball, ballDirX, ballDirY):
    ball.x += ballDirX
    ball.y += ballDirY
    return ball

#Checks for a collision with a wall, and 'bounces' ball off it.
#Returns new direction
def checkEdgeCollision(ball, ballDirX, ballDirY):
    if ball.top == (LINETHICKNESS) or ball.bottom == (WINDOWHEIGHT - LINETHICKNESS):
        ballDirY = ballDirY * -1
    if ball.left == (LINETHICKNESS) or ball.right == (WINDOWWIDTH - LINETHICKNESS):
        ballDirX = ballDirX * -1
    return ballDirX, ballDirY

#Checks is the ball has hit a paddle, and 'bounces' ball off it.
def checkHitBall(ball, paddle1, paddle2, ballDirX):
    if ballDirX == -1 and paddle1.right == ball.left and paddle1.top < ball.top and paddle1.bottom > ball.bottom:
        return -1
    elif ballDirX == 1 and paddle2.left == ball.right and paddle2.top < ball.top and paddle2.bottom > ball.bottom:
        return -1
    else: return 1

#Checks to see if a point has been scored returns new score
def checkPointScored(paddle1, ball, score, ballDirX):
    #reset points if left wall is hit
    if ball.left == LINETHICKNESS:
        return 0
    #1 point for hitting the ball
    elif ballDirX == -1 and paddle1.right == ball.left and paddle1.top < ball.top and paddle1.bottom > ball.bottom:
        score += 1
        return score
    #5 points for beating the other paddle
    elif ball.right == WINDOWWIDTH - LINETHICKNESS:
        score += 5
        return score
    #if no points scored, return score unchanged
    else: return score

#Artificial Intelligence of computer player
def artificialIntelligence(ball, ballDirX, paddle2):
    #If ball is moving away from paddle, center bat
    if ballDirX == -1:
        if paddle2.centery < (WINDOWHEIGHT/2):
            paddle2.y += 1
        elif paddle2.centery > (WINDOWHEIGHT/2):
            paddle2.y -= 1
    #if ball moving towards bat, track its movement.
    elif ballDirX == 1:
        if paddle2.centery < ball.centery:
            paddle2.y += 1
        else:
            paddle2.y -=1
    return paddle2

#Displays the current score on the screen
def displayScore(score):
    resultSurf = BASICFONT.render('Score = %s' %(score), True, WHITE)
    resultRect = resultSurf.get_rect()
    resultRect.topleft = (WINDOWWIDTH - 150, 25)
    DISPLAYSURF.blit(resultSurf, resultRect)

#Main function
def main():
    pygame.init()
    global DISPLAYSURF
    ##Font information
    global BASICFONT, BASICFONTSIZE
    BASICFONTSIZE = 20
    BASICFONT = pygame.font.Font('freesansbold.ttf', BASICFONTSIZE)

    FPSCLOCK = pygame.time.Clock()
    DISPLAYSURF = pygame.display.set_mode((WINDOWWIDTH,WINDOWHEIGHT))
    pygame.display.set_caption('Pong')

    #Initiate variable and set starting positions
    #any future changes made within rectangles
    ballX = WINDOWWIDTH/2 - LINETHICKNESS/2
    ballY = WINDOWHEIGHT/2 - LINETHICKNESS/2
    playerOnePosition = (WINDOWHEIGHT - PADDLESIZE) /2
    playerTwoPosition = (WINDOWHEIGHT - PADDLESIZE) /2
    score = 0

    #Keeps track of ball direction
    ballDirX = -1 ## -1 = left 1 = right
    ballDirY = -1 ## -1 = up 1 = down

    #Creates Rectangles for ball and paddles.
    paddle1 = pygame.Rect(PADDLEOFFSET,playerOnePosition, LINETHICKNESS,PADDLESIZE)
    paddle2 = pygame.Rect(WINDOWWIDTH - PADDLEOFFSET - LINETHICKNESS, playerTwoPosition, LINETHICKNESS,PADDLESIZE)
    ball = pygame.Rect(ballX, ballY, LINETHICKNESS, LINETHICKNESS)

    #Draws the starting position of the Arena
    drawArena()
    drawPaddle(paddle1)
    drawPaddle(paddle2)
    drawBall(ball)

    pygame.mouse.set_visible(0) # make cursor invisible

    while True: #main game loop
        for event in pygame.event.get():
            if event.type == QUIT:
                pygame.quit()
                sys.exit()
            # mouse movement commands
            elif event.type == MOUSEMOTION:
                mousex, mousey = event.pos
                paddle1.y = mousey

        drawArena()
        drawPaddle(paddle1)
        drawPaddle(paddle2)
        drawBall(ball)

        ball = moveBall(ball, ballDirX, ballDirY)
        ballDirX, ballDirY = checkEdgeCollision(ball, ballDirX, ballDirY)
        score = checkPointScored(paddle1, ball, score, ballDirX)
        ballDirX = ballDirX * checkHitBall(ball, paddle1, paddle2, ballDirX)
        paddle2 = artificialIntelligence (ball, ballDirX, paddle2)

        displayScore(score)

        pygame.display.update()
        FPSCLOCK.tick(FPS)

if __name__=='__main__':
    main()
Right we should have the majority of our game written, so how about adding a display of the score?
We will do this in two parts. First we will update the score and then we will display the score.
Before we write our function to update the score lets call that function in our main program.
We only want the score to change if the ball has hit the paddle while moving in a certain direction. Therefore we need to call the function to check the score before we update the ball direction once it has been hit.
Add this line in the main function before you check the ball is hit, but after you have checked edge collision.
score = checkPointScored(paddle1, ball, score, ballDirX)
This line updates the variable score with whatever is returned from the checkPointScored function. What have we forgotten? We need to initiate the variable 'score' as we have with the other variables.
So underneath the line
playerTwoPosition = (WINDOWHEIGHT - PADDLESIZE) /2
add
Score = 0
    playerTwoPosition = (WINDOWHEIGHT - PADDLESIZE) /2
    score = 0
Now we can write our function which will check if any points have been scored and update the score to reflect this.
Our checkPointScored function takes the position of paddle 1, the position of the ball, the current score and the direction of the ball to help determine if a point has been scored.
You can decide how and when points are scored if you want to. My function gives 5 points for beating the computers paddle and one point for hitting the ball. If your paddle is beaten, then your points are reset to 0.
The whole of the function looks as follows.
#Checks to see if a point has been scored returns new score
def checkPointScored(paddle1, ball, score, ballDirX):
    #reset points if left wall is hit
    if ball.left == LINETHICKNESS:
        return 0
    #1 point for hitting the ball
    elif ballDirX == -1 and paddle1.right == ball.left and paddle1.top < ball.top and paddle1.bottom > ball.bottom:
        score += 1
        return score
    #5 points for beating the other paddle
    elif ball.right == WINDOWWIDTH - LINETHICKNESS:
        score += 5
        return score
    #if no points scored, return score unchanged
    else: return score
As always we define the name of the function and the parameters being passed into it.
def checkPointScored(paddle1, ball, score, ballDirX):
We then check to see if the players paddle has been beaten.
    #reset points if left wall is hit
    if ball.left == LINETHICKNESS:
        return 0
If the ball makes it to the left hand side of the arena, we return 0 i.e. reset the score to 0.
Now we look to see if your paddle has been hit. We use the same check we carried out to see if we had hit the ball. We then increase the score by one and return it.
    #1 point for hitting the ball
    elif ballDirX == -1 and paddle1.right == ball.left and paddle1.top < ball.top and paddle1.bottom > ball.bottom:
        score += 1
        return score
Now we see if the computer paddle has been beaten. This is very similar to seeing if your own paddle has been passed by the ball. This time we check the right hand side of the ball and the right hand edge of the arena.
    #5 points for beating the other paddle
    elif ball.right == WINDOWWIDTH - LINETHICKNESS:
        score += 5
        return score
If this happens we add 5 onto the score and return that.
If nothing has happened to cause the score to change we return the score unaffected.
    #if no points scored, return score unchanged
    else: return score
That was all very straight forward wasn't it?
Now we have worked out what our score should be, we need to display the score.
In our main function we will call a function to display the score.
displayScore(score)
Before we write the function we will have to create some information about the font we want to use to display the score.
Underneath global DISPLAYNAME at the top of our main function add the following.
    ##Font information
    global BASICFONT, BASICFONTSIZE
    BASICFONTSIZE = 20
    BASICFONT = pygame.font.Font('freesansbold.ttf', BASICFONTSIZE)
This creates a global variable called BASICFONT and another called BASICFONTSIZE.
We then set BASICFONTSIZE to 20
BASICFONTSIZE = 20
and set the font to freesansbold
BASICFONT = pygame.font.Font('freesansbold.ttf', BASICFONTSIZE)
Now we can write the function which displays the score.
#Displays the current score on the screen
def displayScore(score):
    resultSurf = BASICFONT.render('Score = %s' %(score), True, WHITE)
    resultRect = resultSurf.get_rect()
    resultRect.topleft = (WINDOWWIDTH - 150, 25)
    DISPLAYSURF.blit(resultSurf, resultRect)
The first line creates a new surface called resultSurf.
resultSurf = BASICFONT.render('Score = %s' %(score), True, WHITE)
It then takes the information from BASICFONT and renders it with the following information defined within the brackets.
'Score = %s' %(score)
This explains the text to be displayed. It will say 'Score = %s' where %s is replaced by whatever follows the %. In our case the value stored in the variable score.
Therefore if the score was 4 we would see.
Score = 4
True refers to the fact we want anti-aliasing turned on. I will not go into the technical details of how this achieves its results, as it is beyond the scope of this tutorial. If you are curious then replace True with False and look at how blocky the font looks!
WHITE defines the colour and uses the information we stored in the global variable when we defined the WHITE and BLACK earlier in our program.
The next line
resultRect = resultSurf.get_rect()
This creates a new rectangle called resultRect which is the same size as the surface we created on the previous line. It uses a built in function of pygame called get_rect().
Next we position the new rectangle
resultRect.topleft = (WINDOWWIDTH - 150, 25)
This places the text 'WINDOWWIDTH - 150' in X which is 150 pixels from the right hand side of the screen, and 25 pixels from the top in Y.
Finally we display the surface with
DISPLAYSURF.blit(resultSurf, resultRect)
which uses blit to update just the part of the screen specified by resultRect, which we have just created to match the size of our surface.
There we go, you should have a fully working game of pong.
Stage 9 - Speed Optimisation
import pygame, sys
from pygame.locals import *

# Number of frames per second
# Change this value to speed up or slow down your game
FPS = 40
INCREASESPEED = 5

#Global Variables to be used through our program

WINDOWWIDTH = 400
WINDOWHEIGHT = 300
LINETHICKNESS = 10
PADDLESIZE = 50
PADDLEOFFSET = 20

# Set up the colours
BLACK     = (0  ,0  ,0  )
WHITE     = (255,255,255)

#Draws the arena the game will be played in.
def drawArena():
    DISPLAYSURF.fill((0,0,0))
    #Draw outline of arena
    pygame.draw.rect(DISPLAYSURF, WHITE, ((0,0),(WINDOWWIDTH,WINDOWHEIGHT)), LINETHICKNESS*2)
    #Draw centre line
    pygame.draw.line(DISPLAYSURF, WHITE, ((WINDOWWIDTH/2),0),((WINDOWWIDTH/2),WINDOWHEIGHT), (LINETHICKNESS/4))

#Draws the paddle
def drawPaddle(paddle):
    #Stops paddle moving too low
    if paddle.bottom > WINDOWHEIGHT - LINETHICKNESS:
        paddle.bottom = WINDOWHEIGHT - LINETHICKNESS
    #Stops paddle moving too high
    elif paddle.top < LINETHICKNESS:
        paddle.top = LINETHICKNESS
    #Draws paddle
    pygame.draw.rect(DISPLAYSURF, WHITE, paddle)

#draws the ball
def drawBall(ball):
    pygame.draw.rect(DISPLAYSURF, WHITE, ball)

#moves the ball returns new position
def moveBall(ball, ballDirX, ballDirY):
    ball.x += (ballDirX * INCREASESPEED)
    ball.y += (ballDirY * INCREASESPEED)
    return ball

#Checks for a collision with a wall, and 'bounces' ball off it.
#Returns new direction
def checkEdgeCollision(ball, ballDirX, ballDirY):
    if ball.top == (LINETHICKNESS) or ball.bottom == (WINDOWHEIGHT - LINETHICKNESS):
        ballDirY = ballDirY * -1
    if ball.left == (LINETHICKNESS) or ball.right == (WINDOWWIDTH - LINETHICKNESS):
        ballDirX = ballDirX * -1
    return ballDirX, ballDirY

#Checks is the ball has hit a paddle, and 'bounces' ball off it.
def checkHitBall(ball, paddle1, paddle2, ballDirX):
    if ballDirX == -1 and paddle1.right == ball.left and paddle1.top < ball.top and paddle1.bottom > ball.bottom:
        return -1
    elif ballDirX == 1 and paddle2.left == ball.right and paddle2.top < ball.top and paddle2.bottom > ball.bottom:
        return -1
    else: return 1

#Checks to see if a point has been scored returns new score
def checkPointScored(paddle1, ball, score, ballDirX):
    #reset points if left wall is hit
    if ball.left == LINETHICKNESS:
        return 0
    #1 point for hitting the ball
    elif ballDirX == -1 and paddle1.right == ball.left and paddle1.top < ball.top and paddle1.bottom > ball.bottom:
        score += 1
        return score
    #5 points for beating the other paddle
    elif ball.right == WINDOWWIDTH - LINETHICKNESS:
        score += 5
        return score
    #if no points scored, return score unchanged
    else: return score

#Artificial Intelligence of computer player
def artificialIntelligence(ball, ballDirX, paddle2):
    #If ball is moving away from paddle, center bat
    if ballDirX == -1:
        if paddle2.centery < (WINDOWHEIGHT/2):
            paddle2.y += INCREASESPEED
        elif paddle2.centery > (WINDOWHEIGHT/2):
            paddle2.y -= INCREASESPEED
    #if ball moving towards bat, track its movement.
    elif ballDirX == 1:
        if paddle2.centery < ball.centery:
            paddle2.y += INCREASESPEED
        else:
            paddle2.y -= INCREASESPEED
    return paddle2

#Displays the current score on the screen
def displayScore(score):
    resultSurf = BASICFONT.render('Score = %s' %(score), True, WHITE)
    resultRect = resultSurf.get_rect()
    resultRect.topleft = (WINDOWWIDTH - 150, 25)
    DISPLAYSURF.blit(resultSurf, resultRect)

#Main function
def main():
    pygame.init()
    global DISPLAYSURF
    ##Font information
    global BASICFONT, BASICFONTSIZE
    BASICFONTSIZE = 20
    BASICFONT = pygame.font.Font('freesansbold.ttf', BASICFONTSIZE)

    FPSCLOCK = pygame.time.Clock()
    DISPLAYSURF = pygame.display.set_mode((WINDOWWIDTH,WINDOWHEIGHT))
    pygame.display.set_caption('Pong')

    #Initiate variable and set starting positions
    #any future changes made within rectangles
    ballX = WINDOWWIDTH/2 - LINETHICKNESS/2
    ballY = WINDOWHEIGHT/2 - LINETHICKNESS/2
    playerOnePosition = (WINDOWHEIGHT - PADDLESIZE) /2
    playerTwoPosition = (WINDOWHEIGHT - PADDLESIZE) /2
    score = 0

    #Keeps track of ball direction
    ballDirX = -1 ## -1 = left 1 = right
    ballDirY = -1 ## -1 = up 1 = down

    #Creates Rectangles for ball and paddles.
    paddle1 = pygame.Rect(PADDLEOFFSET,playerOnePosition, LINETHICKNESS,PADDLESIZE)
    paddle2 = pygame.Rect(WINDOWWIDTH - PADDLEOFFSET - LINETHICKNESS, playerTwoPosition, LINETHICKNESS,PADDLESIZE)
    ball = pygame.Rect(ballX, ballY, LINETHICKNESS, LINETHICKNESS)

    #Draws the starting position of the Arena
    drawArena()
    drawPaddle(paddle1)
    drawPaddle(paddle2)
    drawBall(ball)

    pygame.mouse.set_visible(0) # make cursor invisible

    while True: #main game loop
        for event in pygame.event.get():
            if event.type == QUIT:
                pygame.quit()
                sys.exit()
            # mouse movement commands
            elif event.type == MOUSEMOTION:
                mousex, mousey = event.pos
                paddle1.y = mousey

        drawArena()
        drawPaddle(paddle1)
        drawPaddle(paddle2)
        drawBall(ball)

        ball = moveBall(ball, ballDirX, ballDirY)
        ballDirX, ballDirY = checkEdgeCollision(ball, ballDirX, ballDirY)
        score = checkPointScored(paddle1, ball, score, ballDirX)
        ballDirX = ballDirX * checkHitBall(ball, paddle1, paddle2, ballDirX)
        paddle2 = artificialIntelligence (ball, ballDirX, paddle2)

        #displayScore(score)

        pygame.display.update()
        FPSCLOCK.tick(FPS)

if __name__=='__main__':
    main()
So we now have a fully working game of PONG. What do you feel about the speed of the game. For me it runs very well on my PC, a little slow on my Mac and very slow on my Raspberry Pi. Some of you will be able to tweak the value set in FPS to slow down or speed up the game. However if your system is running flat out what can you do to speed it up?
The main reason the game slows down is because it struggles to refresh the screen at the desired FPS. Quite a common problem in Pygame.
There are a few options to help improve the situation. You can do one or all of the following.
Increase movement per frame.
Well at the moment you are moving the ball only one pixel per frame. We can increase this.
Under the line where you defined the FPS add the following line.
INCREASESPEED = 5
Now when you move the ball in the moveBall function instead of increasing its location by one, increase it by 5 using the following.
#moves the ball returns new position
def moveBall(ball, ballDirX, ballDirY):
    ball.x += (ballDirX * INCREASESPEED)
    ball.y += (ballDirY * INCREASESPEED)
    return ball
To ensure the computers paddle is not massively slow in relation to this you should also make a similar change in the artificialIntelligence function.
#Artificial Intelligence of computer player
def artificialIntelligence(ball, ballDirX, paddle2):
    #If ball is moving away from paddle, center bat
    if ballDirX == -1:
        if paddle2.centery < (WINDOWHEIGHT/2):
            paddle2.y += INCREASESPEED
        elif paddle2.centery > (WINDOWHEIGHT/2):
            paddle2.y -= INCREASESPEED
    #if ball moving towards bat, track its movement.
    elif ballDirX == 1:
        if paddle2.centery < ball.centery:
            paddle2.y += INCREASESPEED
        else:
            paddle2.y -= INCREASESPEED
    return paddle2
Instead of increasing the paddle position by a value of 1 it increases it by the value stored in INCREASESPEED.
There is a warning with this method of increasing the speed. While the value 5 works in this case, increasing the value of INCREASESPEED may mean the paddles do not recognise when the ball is hit or the ball does not bounce off the side of the arena. The ball jumps by 5 pixels, which is ok. If it jumps by 10 or 20 it may not detect collision with the wall or paddle and will appear to pass through them.
Another option is simply don't display the score!
One thing which slows the game down more than anything is the displaying of the score. So to stop this slowing down the game, don't display the score!
Place a hash tag in front of the line displayScore(score) and this will stop the screen updating the score.
#displayScore(score)
I hope you have enjoyed writing this game of pong as much as I did. Hopefully you have learned a few new Pygame tools to aid you with programming your own games!
Update
Since writing this blog post Nat over at
Webucator has turned this blog post into an excellent video tutorial which refactors the code using OOP. Its definitely worth having a look at the video they have created, which I discuss in a later blog post.
Further Update
The wonderful MagPi magazine have used this blog post as the basis of one of their tutorials. Check it out in Issue 53 of the MagPi (Page 26/27).